Exercise 1: Azure AD apps and .NET core web APIs
In this exercise, you’ll create a new Azure AD app registration using the Azure AD admin center and grant administrator consent to the required permission scopes.
Prerequisites
Developing Microsoft Graph apps requires a Microsoft 365 tenant.
For the Microsoft 365 tenant, follow the instructions on the Microsoft 365 Developer Program site for obtaining a developer tenant if you don’t currently have a Microsoft 365 account.
You’ll use the .NET SDK to create custom Microsoft Graph app in this module. The exercises in this module assume you have the following tools installed on your developer workstation.
[!IMPORTANT] In most cases, installing the latest version of the following tools is the best option. The versions listed here were used when this module was published and last tested.
- .NET SDK - v5.* (or higher)
- ngrok
- Visual Studio Code
You must have the minimum versions of these prerequisites installed on your workstation.
Task 1: Register Azure AD app
-
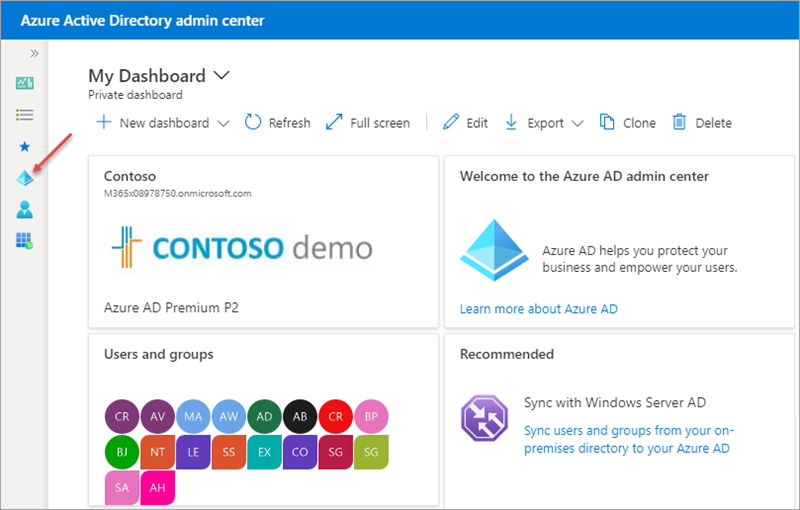
Open a browser and navigate to the Azure Active Directory admin center. Login using a Work or School Account.
-
Select Azure Active Directory in the left-hand navigation.
-
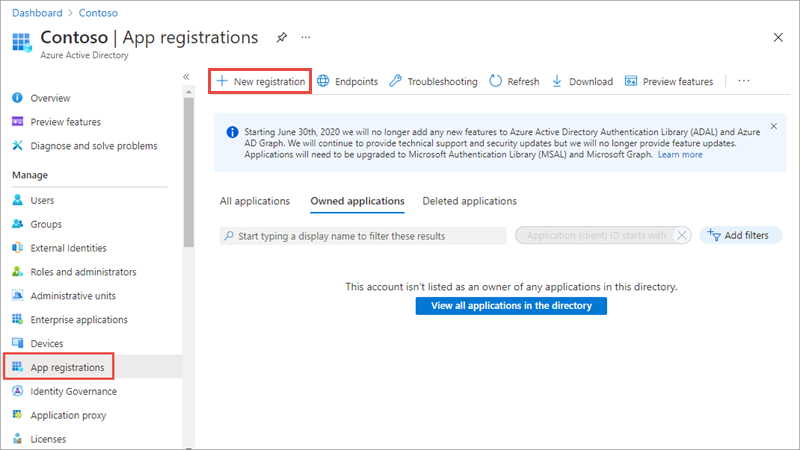
Select Manage > App registrations in the left-hand navigation.
- On the App registrations page, select New registration.
- On the Register an application page, set the values as follows:
- Name: GraphNotificationTutorial
- Supported account types: Accounts in any organizational directory and personal Microsoft accounts
- Redirect URI: Web > http://localhost

-
Select Register.
-
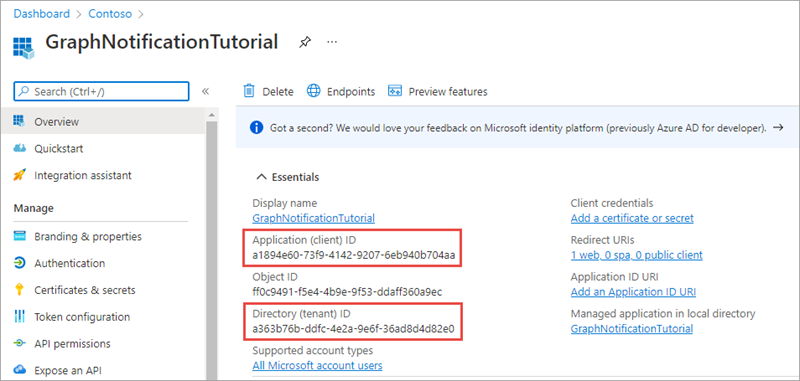
On the GraphNotificationTutorial page, copy the value of the Application (client) ID and Directory (tenant) ID save it, you’ll need them later in the exercise.
-
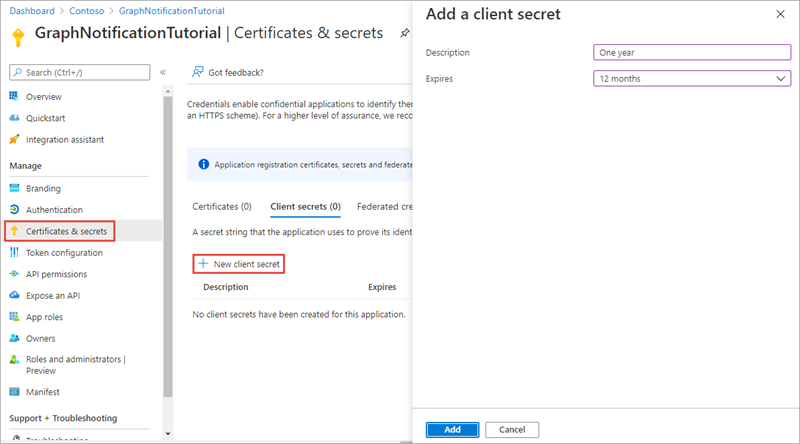
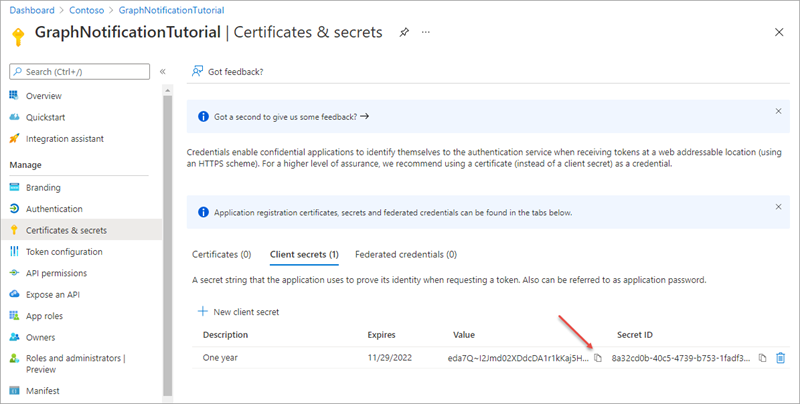
Select Manage > Certificates & secrets.
-
Select New client secret.
-
Enter a value in Description and select one of the options for Expires and select Add.
- Copy the client secret value before you leave this page. You’ll need it later in the exercise.
[!IMPORTANT] This client secret is never shown again, so make sure you copy it now.
-
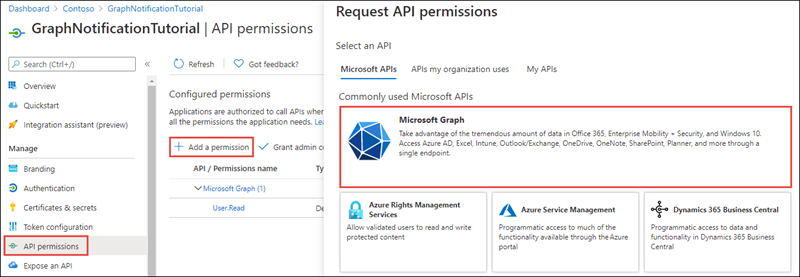
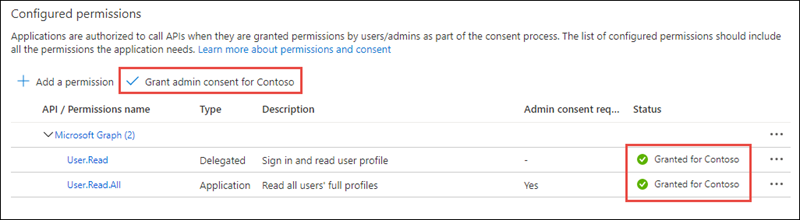
Select Manage > API Permissions.
-
Select Add a permission and select Microsoft Graph.
-
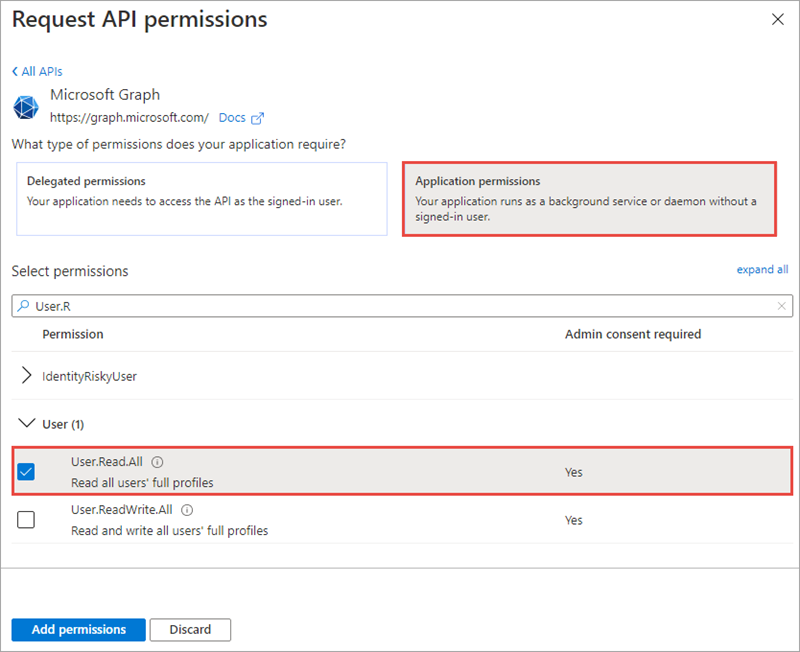
Select Application Permission, expand the User group, and select User.Read.All scope.
-
Select Add permissions to save your changes.
-
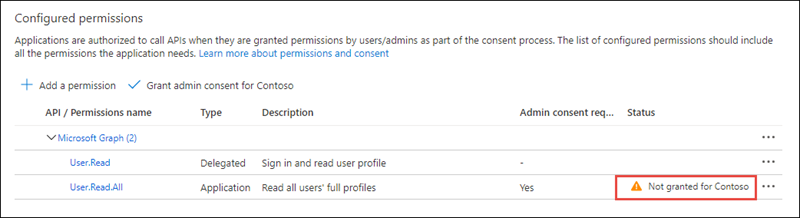
The application requests an application permission with the User.Read.All scope. This permission requires administrative consent.
-
Select Grant admin consent for [your tenant name], then select Yes to consent this application and grant the application access to your tenant using the scopes you specified.
Task 2: Create an ASP.NET Core web API project
In order for the Microsoft Graph to send notifications to your application running on your development machine, you need to use a tool such as ngrok to tunnel calls from the internet to your development machine. Ngrok allows calls from the internet to be directed to your application running locally without needing to create firewall rules.
- Run ngrok by executing the following command from the command line:
ngrok http 5000
-
This will start ngrok and will tunnel requests from an external ngrok url to your development machine on port 5000.
-
Copy the https forwarding address. In the following sample output, that is
https://787b8292.ngrok.io. You’ll need this URL later.
ngrok by @inconshreveable

Session Status                online
Version                       2.3.15
Region                        United States (us)
Web Interface                 http://127.0.0.1:4040
Forwarding                    http://787b8292.ngrok.io -> http://localhost:5000
Forwarding                    https://787b8292.ngrok.io -> http://localhost:5000

Connections                   ttl     opn     rt1     rt5     p50     p90
                              0       0       0.00    0.00    0.00    0.00
[!IMPORTANT] Each time ngrok is restarted a new address will be generated and you’ll need to copy it again.
- Open your command prompt, navigate to a directory where you have rights to create your project, and run the following command to create a new .NET Core WebApi app:
dotnet new webapi -o msgraphapp
- After creating the application, run the following commands to ensure your new project runs correctly.
cd msgraphapp
dotnet nuget add source --name nuget.org https://api.nuget.org/v3/index.json
dotnet add package Microsoft.Identity.Client
dotnet add package Microsoft.Graph
dotnet dev-certs https --trust
dotnet run
- The application will start and display the following in the console:
info: Microsoft.Hosting.Lifetime[0]
      Now listening on: https://localhost:5001
info: Microsoft.Hosting.Lifetime[0]
      Now listening on: http://localhost:5000
info: Microsoft.Hosting.Lifetime[0]
      Application started. Press Ctrl+C to shut down.
info: Microsoft.Hosting.Lifetime[0]
      Hosting environment: Development
info: Microsoft.Hosting.Lifetime[0]
      Content root path: [your file path]\msgraphapp
-
Stop the application running by pressing CTRL+C.
-
Open the application in Visual Studio Code using the following command:
code .
- If Visual Studio Code displays a dialog box asking if you want to add required assets to the project, select Yes.
Task 3: Update the console app to enable nullable reference types
Nullable reference types refers to a group of features introduced in C# 8.0 that you can use to minimize the likelihood that your code causes the runtime to throw System.NullReferenceException.
Nullable reference types are enabled by default in .NET 6 projects, they are disabled by default in .NET 5 projects.
Ensuring that nullable reference types are enabled is not related to the use of Microsoft Graph, it just ensures the exercises in this module can contain a single set of code that will compile without warnings when using either .NET 5 or .NET 6.
Open the msgraphapp.csproj file and ensure the <PropertyGroup> element contains the following child element:
<Nullable>enable</Nullable>
Summary
In this exercise, you created a new Azure AD app registration using the Azure AD admin center and grant administrator consent to the required permission scopes.