Exercise 3: Modifying users
In this exercise, you’ll modify an existing Azure AD application registration using the Azure Active Directory admin center, a .NET Core console application, and use Microsoft Graph to create, update, and delete users in your organization.
[!IMPORTANT] This exercise assumes you have created the Azure AD application and .NET console application from the previous unit in this module. You’ll edit the existing Azure AD application and .NET console application created in that exercise in this exercise.
Task 1: Set up the .NET Core console application
-
Locate the Program.cs file from the application you created in a previous unit in this module.
-
Within the
Mainmethod, locate the following line
var client = GetAuthenticatedGraphClient(config);
- Delete all code within the
Mainmethod after the above line.
Task 2: Create a new user in your organization
- Add the following
usingstatement to the top of the Program.cs file:
using System.Threading.Tasks;
- Add the following code to the end of the
Mainmethod. This code will call a method that will use Microsoft Graph to create a new user:
// request 1: create user
var resultNewUser = CreateUserAsync(client);
resultNewUser.Wait();
Console.WriteLine("New user ID: " + resultNewUser.Id);
- Next, add the
CreateUserAsync()method to the console application:
private static async Task<Microsoft.Graph.User> CreateUserAsync(GraphServiceClient client) {
  Microsoft.Graph.User user = new Microsoft.Graph.User() {
    AccountEnabled = true,
    GivenName = "Melissa",
    Surname = "Darrow",
    DisplayName = "Melissa Darrow",
    MailNickname = "MelissaD",
    UserPrincipalName = "melissad@",
    PasswordProfile = new PasswordProfile() {
      Password = "Password1!",
      ForceChangePasswordNextSignIn = true
    }
  };
  var requestNewUser = client.Users.Request();
  return await requestNewUser.AddAsync(user);
}
- Update the `` string with the domain of your organization. You can find this if you sign in to the Azure AD admin portal (https://aad.portal.azure.com):

Update the Azure AD application’s permissions
-
The last step is to grant the application the necessary permission to create a new user.
-
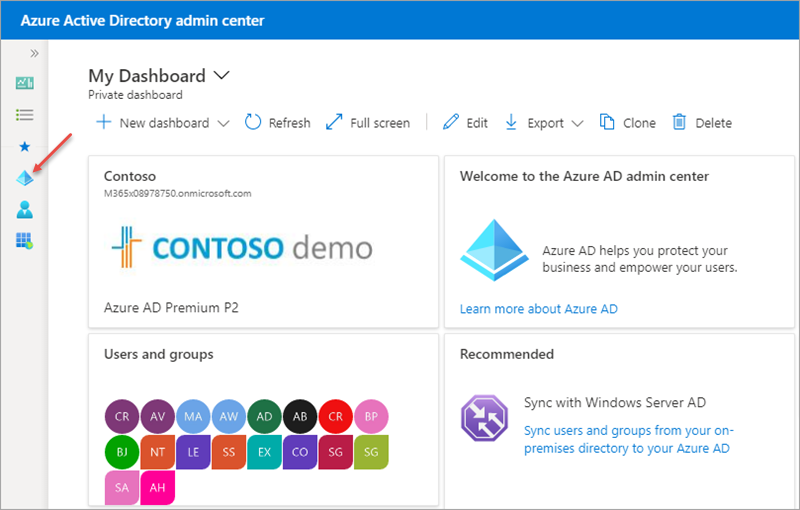
Open a browser and navigate to the Azure Active Directory admin center (https://aad.portal.azure.com). Sign in using a Work or School Account that has global administrator rights to the tenancy.
-
Select Azure Active Directory in the left-hand navigation.
-
Select Manage > App registrations in the left-hand navigation.
-
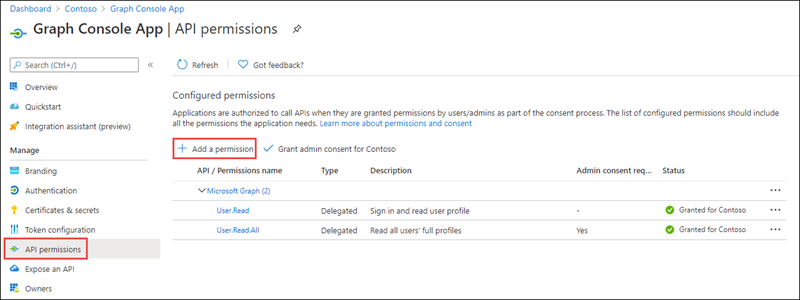
On the App registrations page, select the Graph Console App.
-
Select API Permissions in the left-hand navigation panel.
-
Select the Add a permission button.
-
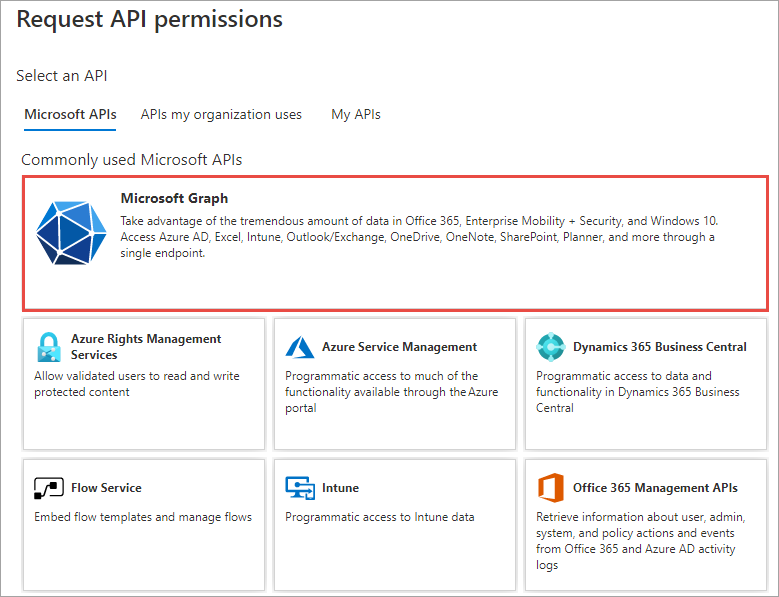
In the Request API permissions panel that appears, select Microsoft Graph from the Microsoft APIs tab.
-
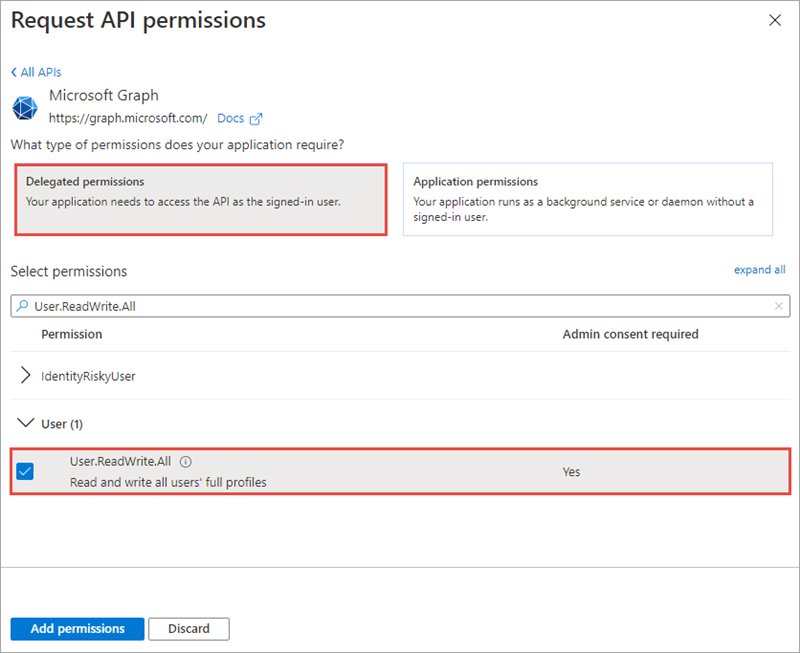
When prompted for the type of permission, select Delegated permissions.
-
Enter User.R in the Select permissions search box and select the User.ReadWrite.All permission, followed by the Add permission button at the bottom of the panel.
- In the Configured Permissions panel, select the button Grant admin consent for [tenant], and then select the Yes button in the consent dialog to grant all users in your organization this permission.
Build and test the application
- Run the following command in a command prompt to compile and run the console application:
dotnet build
dotnet run
You now need to authenticate with Azure Active Directory. A new tab in your default browser should open to a page asking you to sign-in. After you’ve logged in successfully, you’ll be redirected to a page displaying the message, “Authentication complete. You can return to the application. Feel free to close this browser tab”. You may now close the browser tab and switch back to the console application.
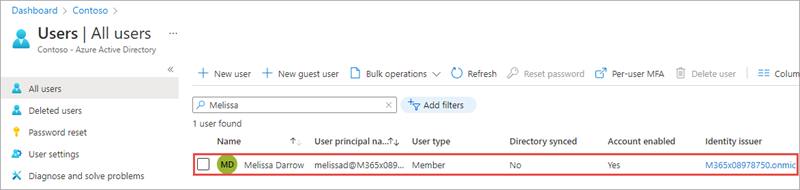
- The application will display the ID of the new user. Verify the user was created by going back to the Azure Active Directory admin center, selecting Manage > Users and finding the new user:
Task 3: Update an existing user
In this section, you’ll update the .NET Core console application to update the user created in the previous section.
- First, comment out the following code you added in the previous section. Otherwise, the application will throw an error when it tries to create the same user again:
// request 1: create user
var resultNewUser = CreateUserAsync(client);
resultNewUser.Wait();
Console.WriteLine("New user ID: " + resultNewUser.Id);
- Next, add the following code. This will update the user you created in the last section:
// request 2: update user
// (1/2) get the user we just created
var userToUpdate = client.Users.Request()
                               .Select("id")
                               .Filter("UserPrincipalName eq 'melissad@'")
                               .GetAsync()
                               .Result[0];
// (2/2) update the user's phone number
var resultUpdatedUser = UpdateUserAsync(client, userToUpdate.Id);
resultUpdatedUser.Wait();
Console.WriteLine("Updated user ID: " + resultUpdatedUser.Id);
- Update the `` string with the domain of your organization.
Next, add the UpdateUserAsync() method to the console application:
private static async Task<Microsoft.Graph.User> UpdateUserAsync(GraphServiceClient client, string userIdToUpdate) {
  Microsoft.Graph.User user = new Microsoft.Graph.User() {
    MobilePhone = "555-555-1212"
  };
  return await client.Users[userIdToUpdate].Request().UpdateAsync(user);
}
Build and test the application
- Run the following command in a command prompt to compile and run the console application:
dotnet build
dotnet run
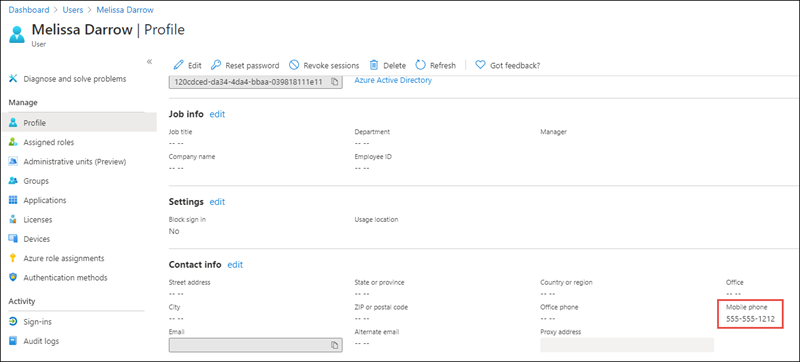
- After you’ve logged in, you’ll see the ID of the updated user. Verify the user was updated by going back to the Azure Active Directory admin center, selecting Manage > Users and finding the user. Select the user and examine the Mobile phone property. It may take a moment to reflect the change, so be patient and keep refreshing the page:
Delete the existing user
In this section, you’ll update the .NET Core console application to delete the user updated in the previous section.
- Add the following code to the end of the
Main()method in the console application:
// request 3: delete user
var deleteTask = DeleteUserAsync(client, userToUpdate.Id);
deleteTask.Wait();
- Next, add the
DeleteUserAsync()method to the console application:
private static async Task DeleteUserAsync(GraphServiceClient client, string userIdToDelete) {
  await client.Users[userIdToDelete].Request().DeleteAsync();
}
Build and test the application
- Run the following command in a command prompt to compile and run the console application:
dotnet build
dotnet run
- After you’ve logged in, you’ll see the application exit without error. Verify the user was deleted by going back to the Azure Active Directory admin center, selecting Manage > Users and trying to find the user. They shouldn’t be present in the search results:

Summary
In this exercise, you modified an existing Azure AD application registration using the Azure Active Directory admin center, a .NET Core console application, and use Microsoft Graph to create, update, and delete users in your organization.